Quick start
From install to your first protected request in five minutes
Install LocalGuard, connect your AI tools, see what they send, and turn on protection. No code changes, no config files to edit by hand.
Install LocalGuard
Grab the installer from the Download page: macOS (.dmg, Apple Silicon), Windows (.exe) or Linux (.AppImage / .deb). Launch it: a window opens once to connect your tools, and from then on LocalGuard lives quietly in your menu bar / system tray.
On first launch LocalGuard downloads its on-device AI model (about 330 MB, once). Pattern matching works while it downloads; the model adds personal names and locations.
The tray icon shows the state at a glance: shield: protection on; warning sign: detect-only, providers receive your original text; grey: paused.
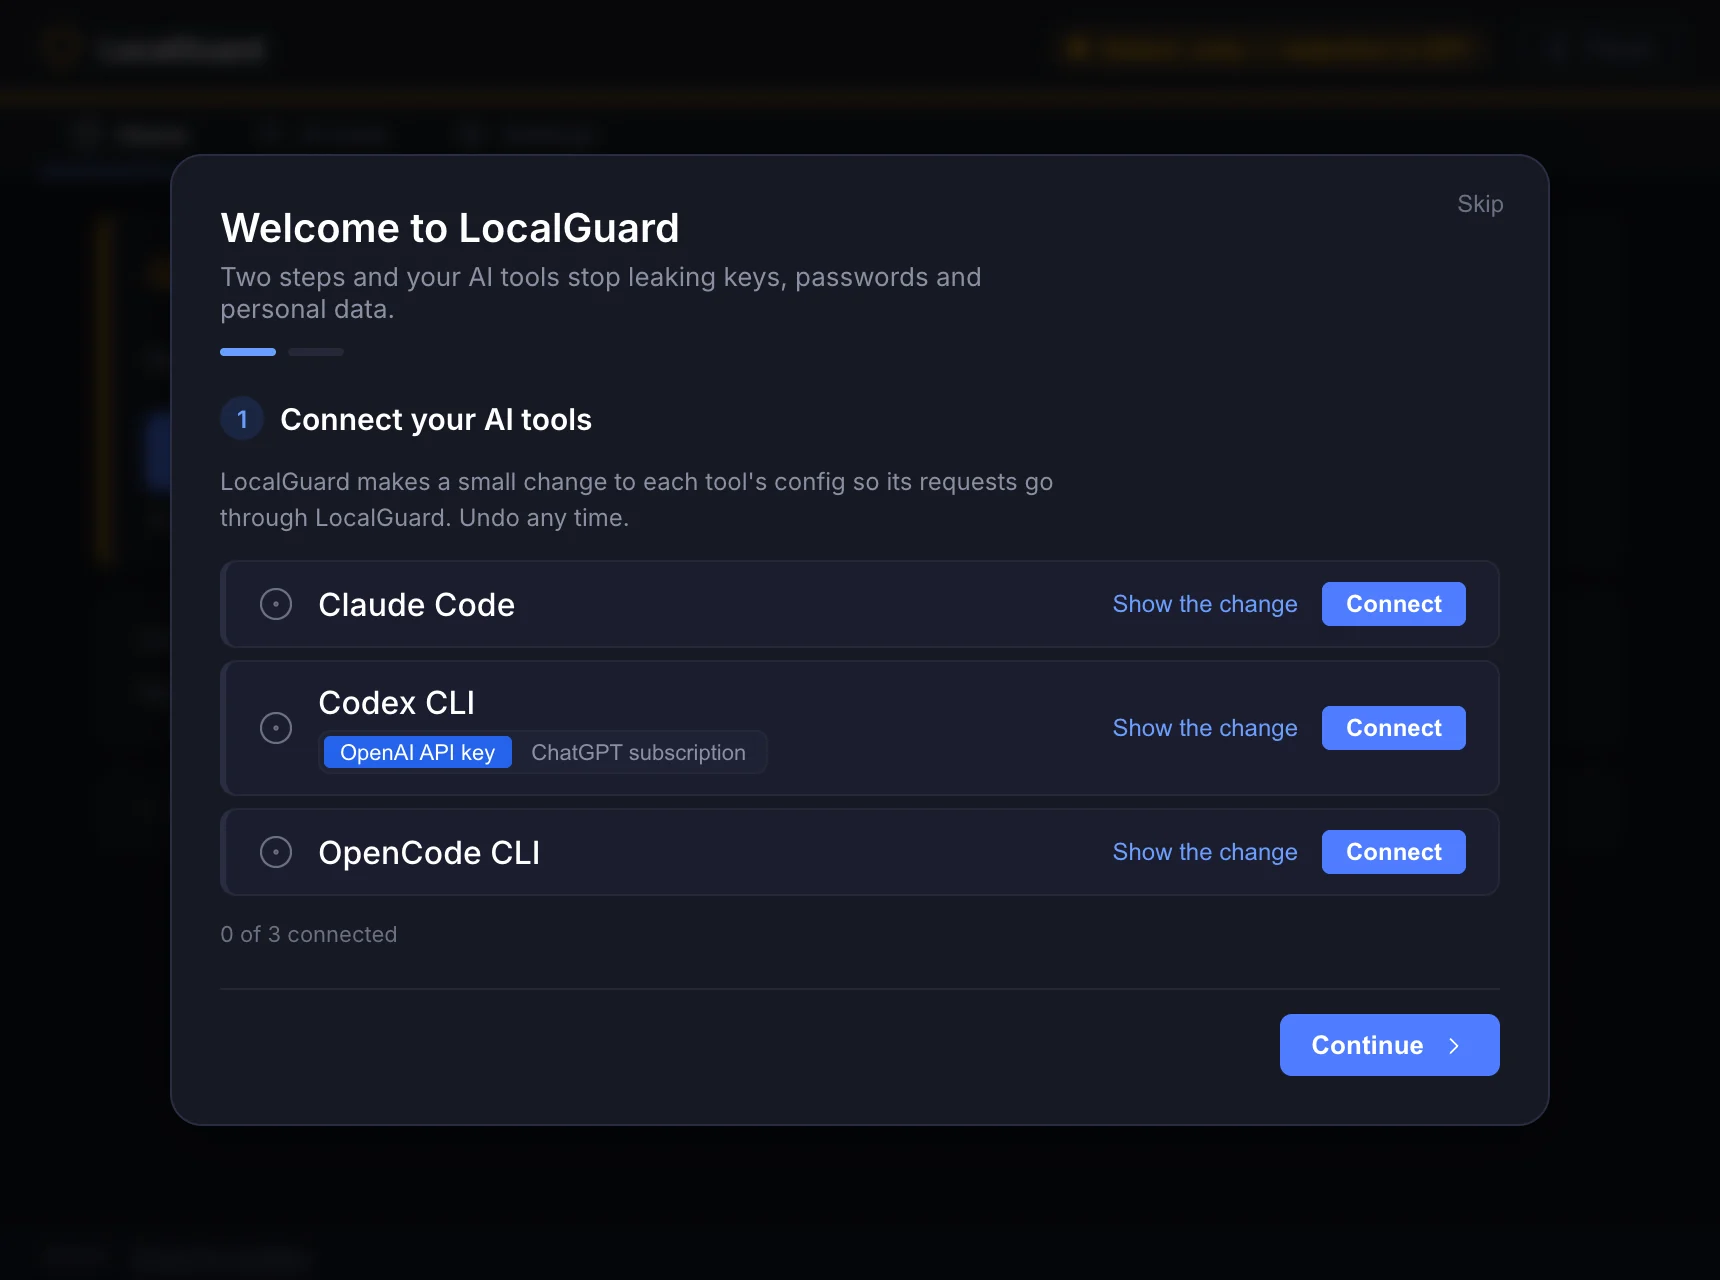
Connect your AI tools in one click
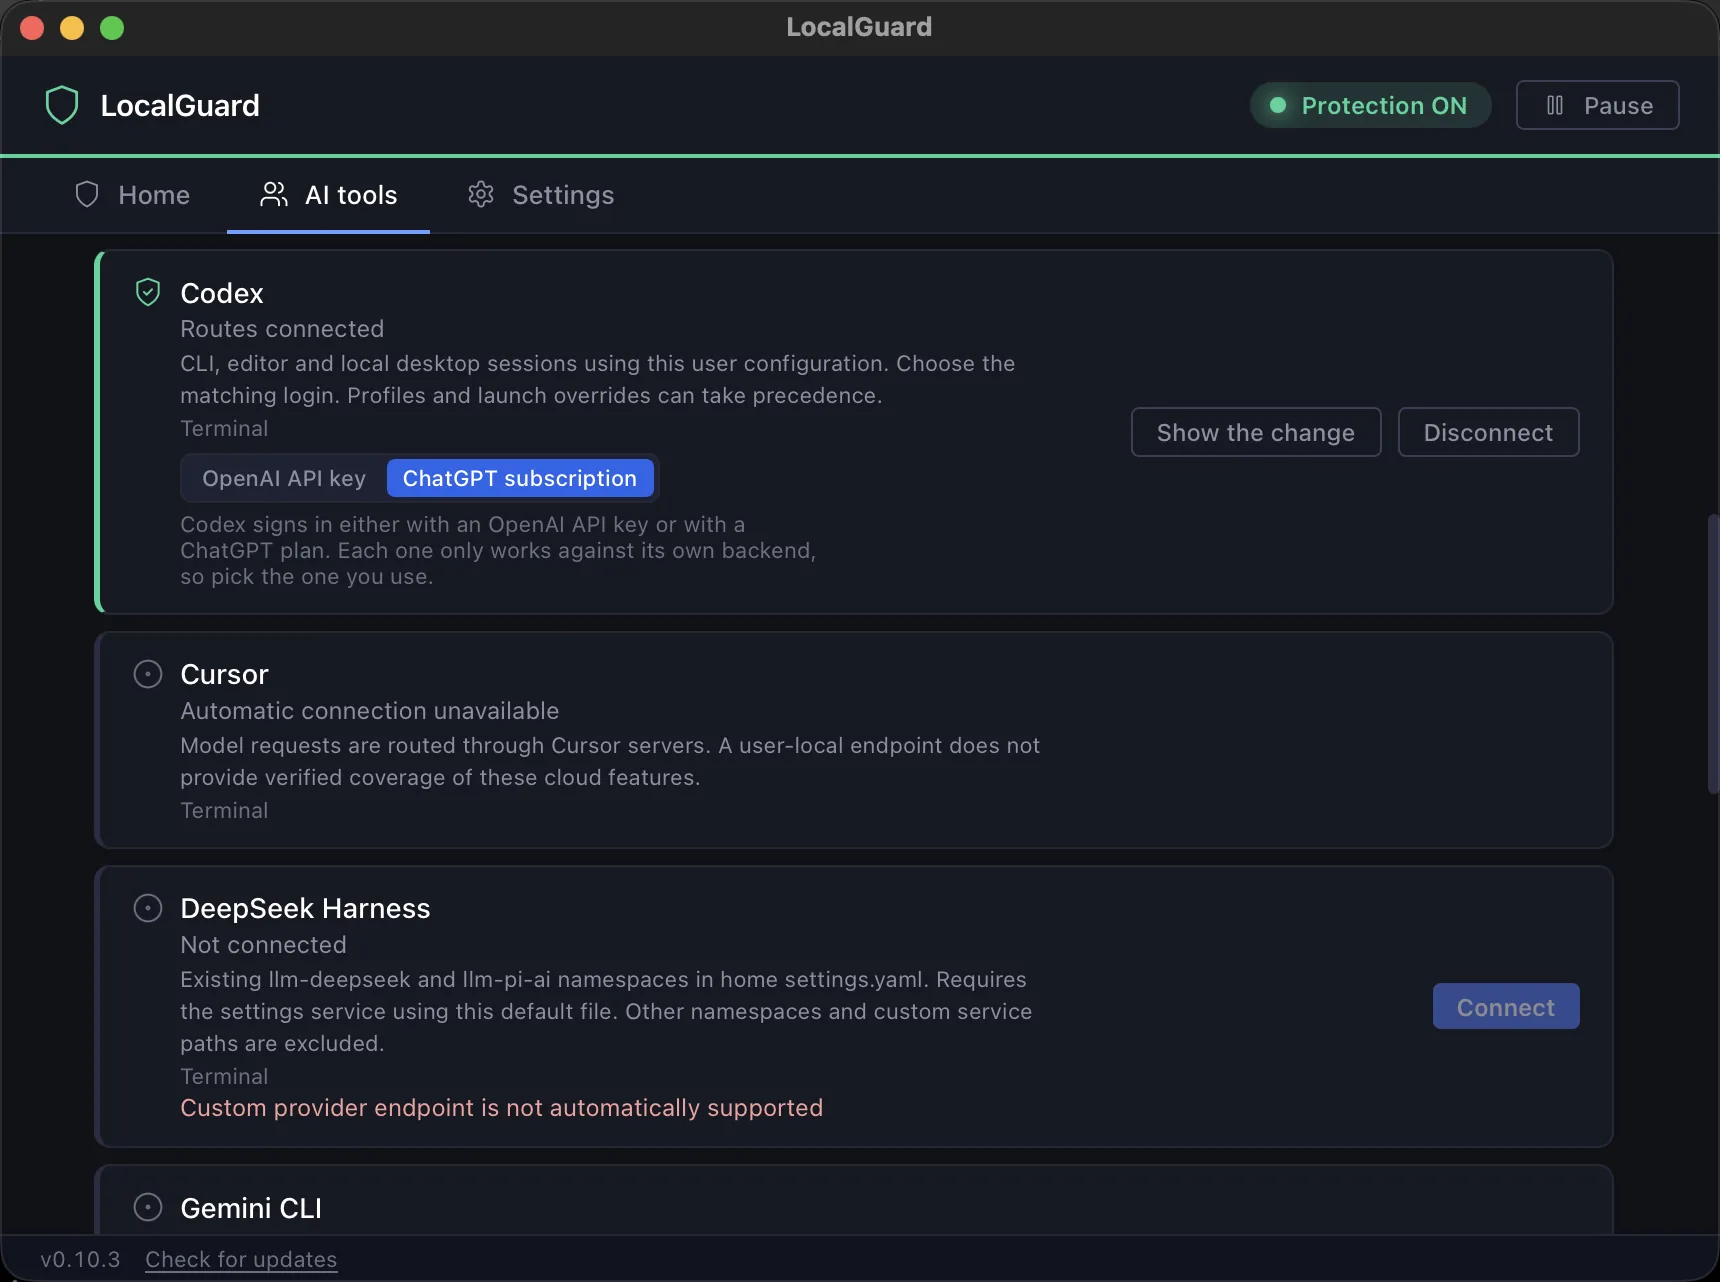
LocalGuard has an alphabetical catalog of 33 audited tool families, with automatic connection for 24 local integrations. It detects installed command-line tools, desktop apps and editor extensions. Click Connect to apply the supported routing settings; Show the change is an optional preview. Disconnect restores the original routes while preserving credentials, model choices and later edits.
Supported tools: Aider, Claude Code, Cline, Codex, CommandCode, Continue, Crush, DeepSeek Harness, Gemini CLI, Goose, Hermes, Kilo Code, Letta, MimoCode, omp, OpenClaw, OpenCode, OpenHands, Pi, ProtoAgent, Qwen Code, shell-gpt, Strix and Zed.
Each tool explains its coverage in the AI tools tab. For Codex, choose your API-key or ChatGPT-plan login. Gemini CLI supports API-key login only. Other subscriptions, cloud execution, project settings and shell variables can use separate routes. Restart the tool after connecting.
Connection unavailable? The app explains why. See the nine families without automatic connection. Manual setup in Step 7 requires a tool that can send model requests directly to a configurable local address.
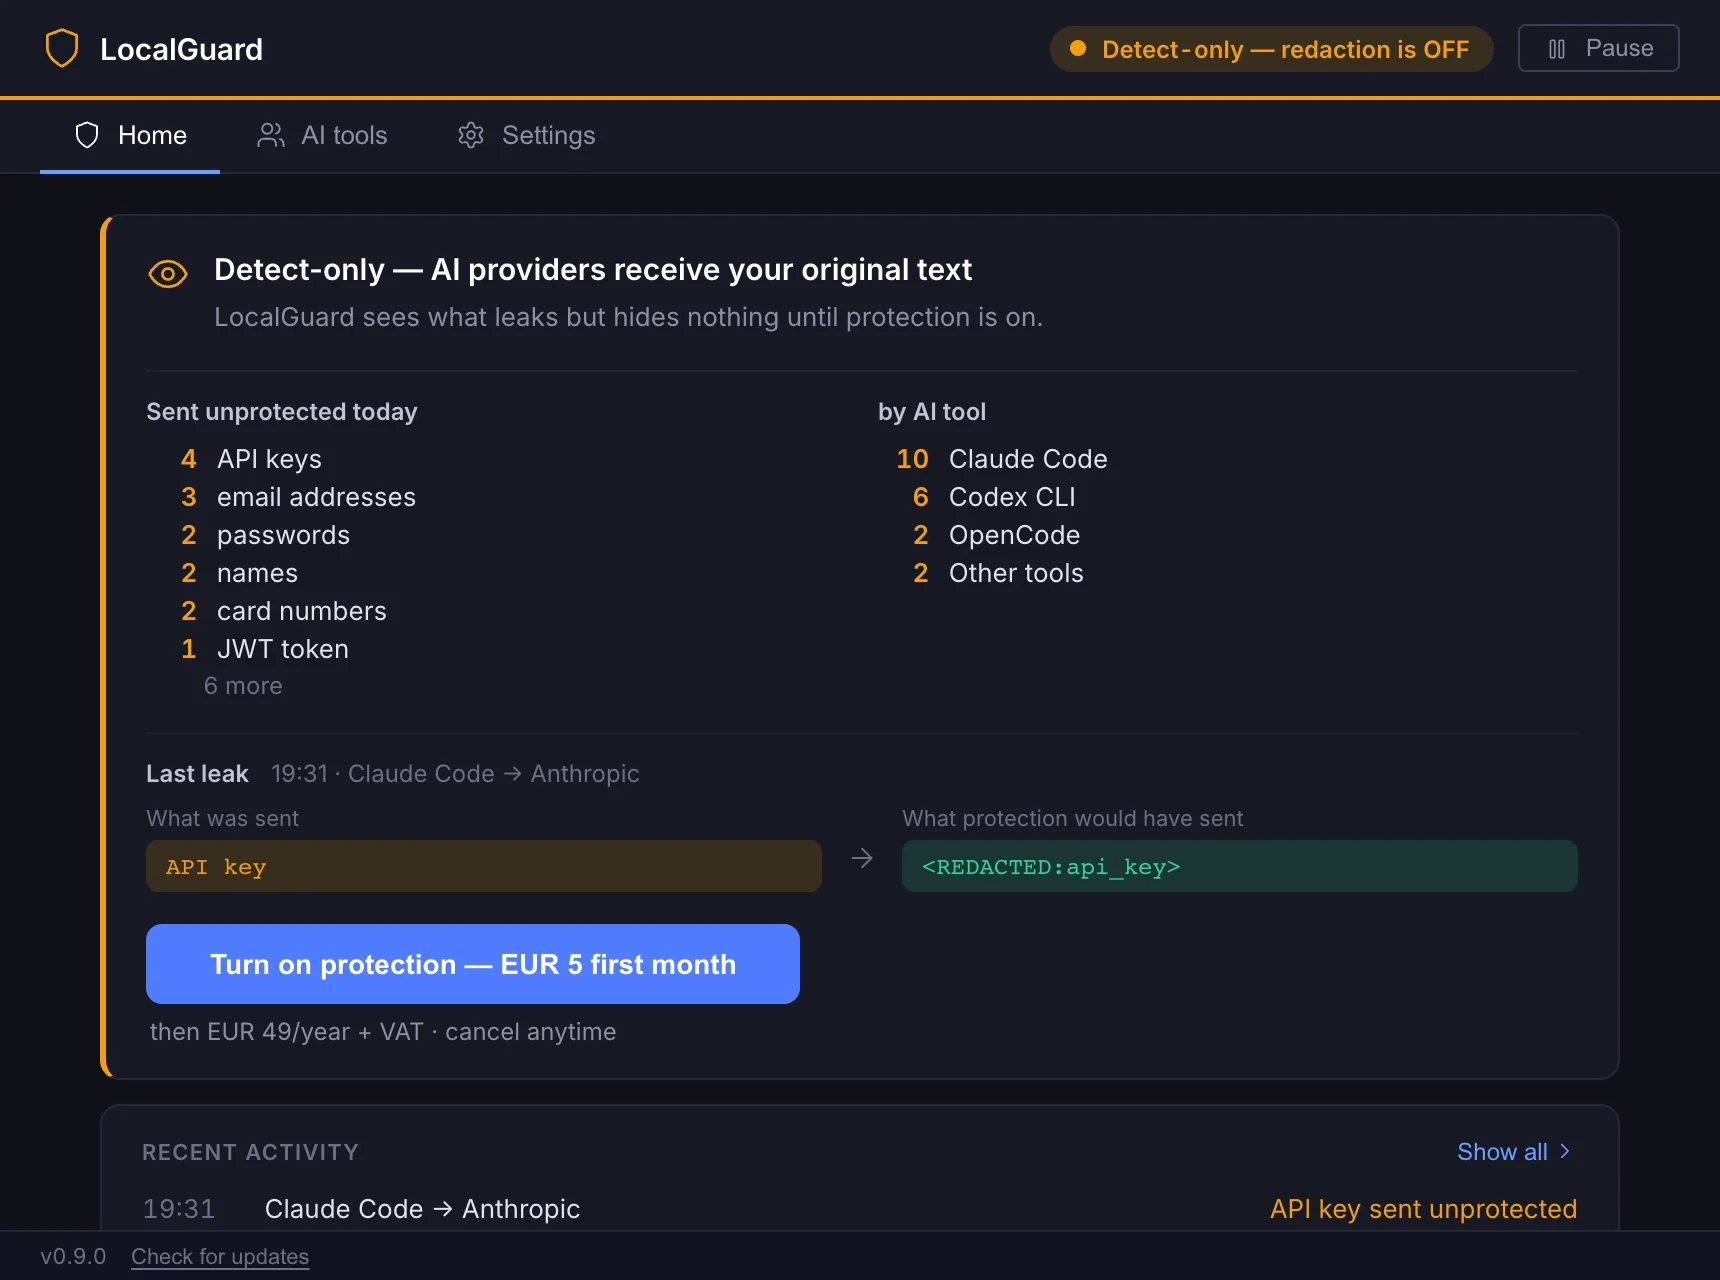
See what your tools send
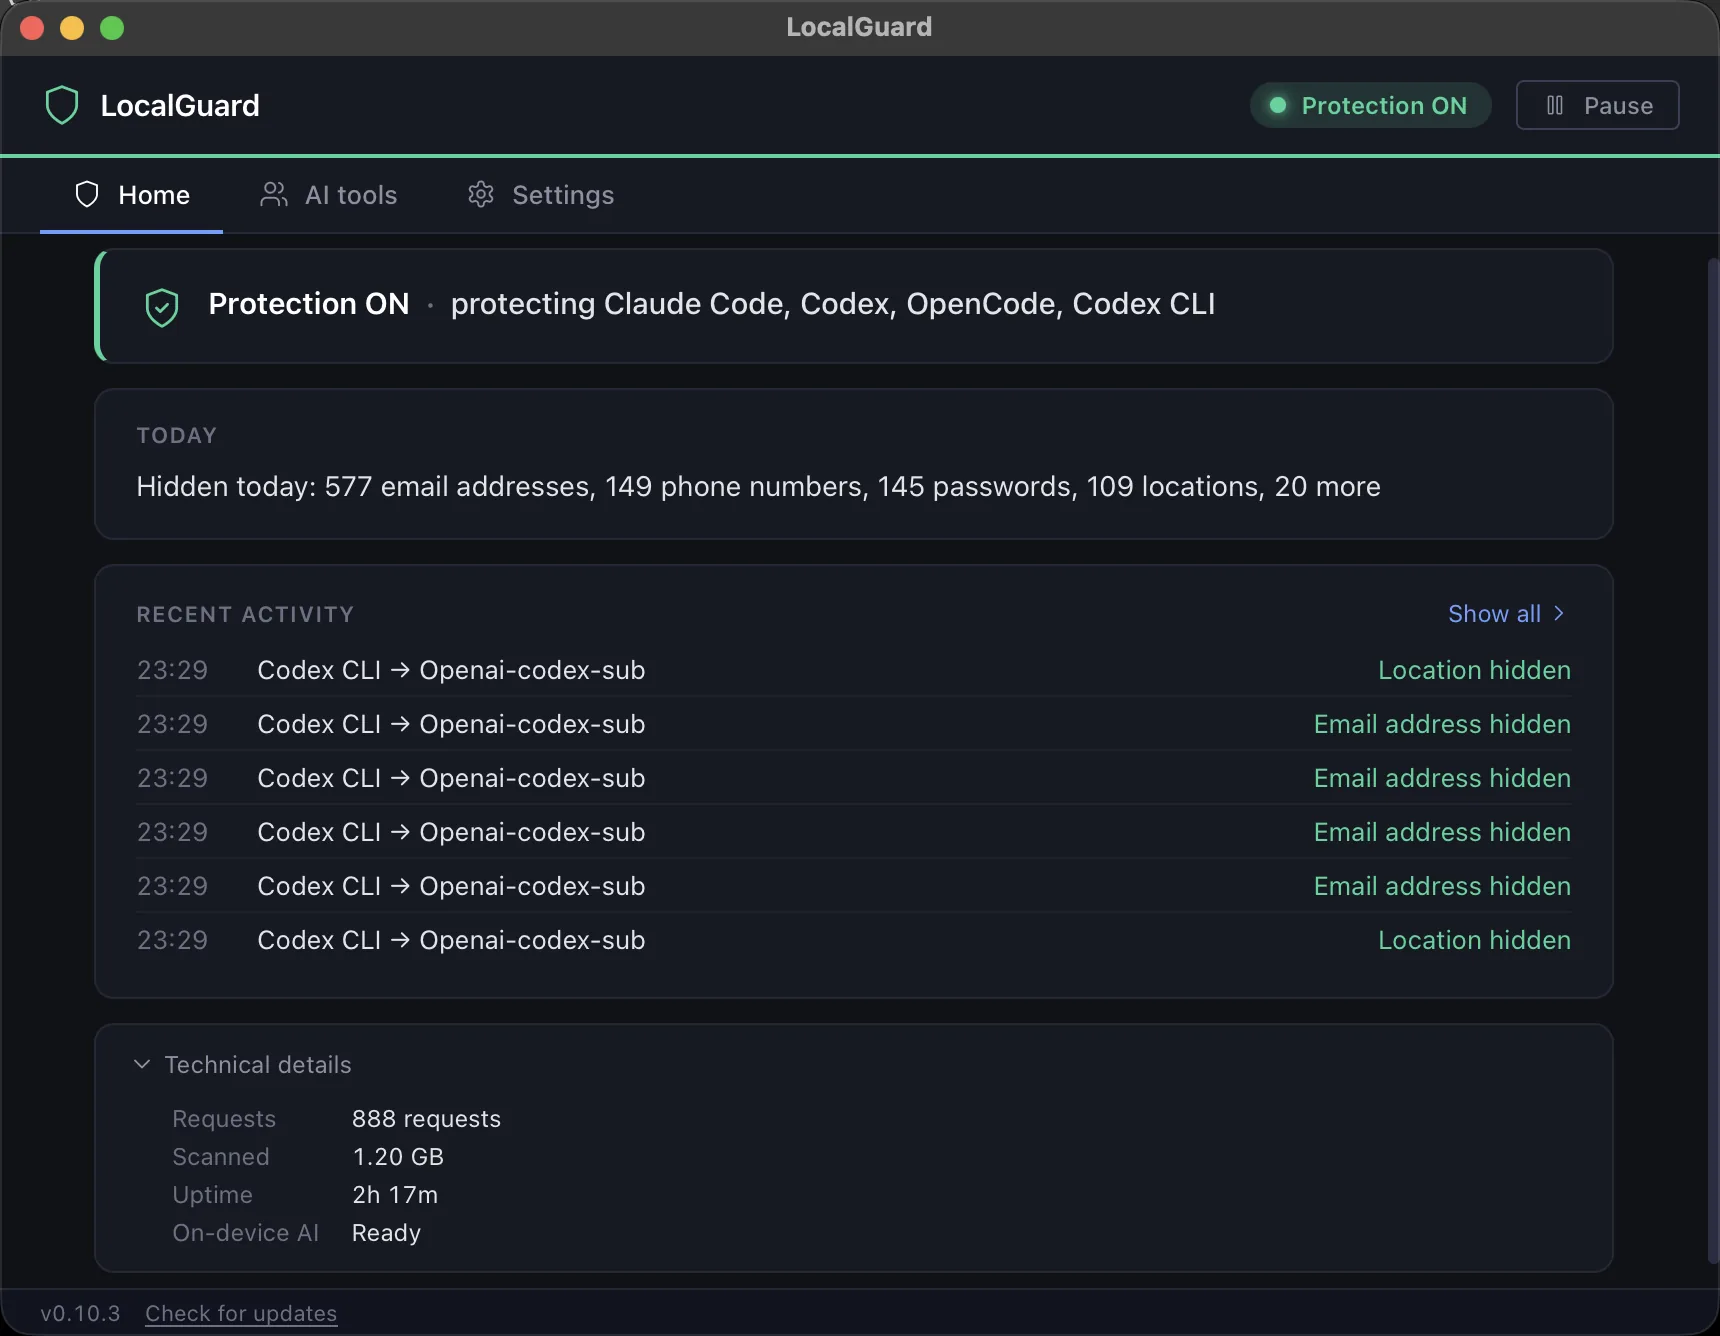
Use your tools as usual. Without a subscription LocalGuard runs in detect-only mode: it scans every request and shows on the Home tab what went out (API keys, passwords, emails, card numbers, names) and which tool sent it to which provider. Nothing is changed: providers receive your original text.
LocalGuard never displays a credential itself, only its type. Other data is shown partly masked, next to what protection would have sent instead.
Not watching the window? At most once a day a notification tells you what your tools sent unprotected.
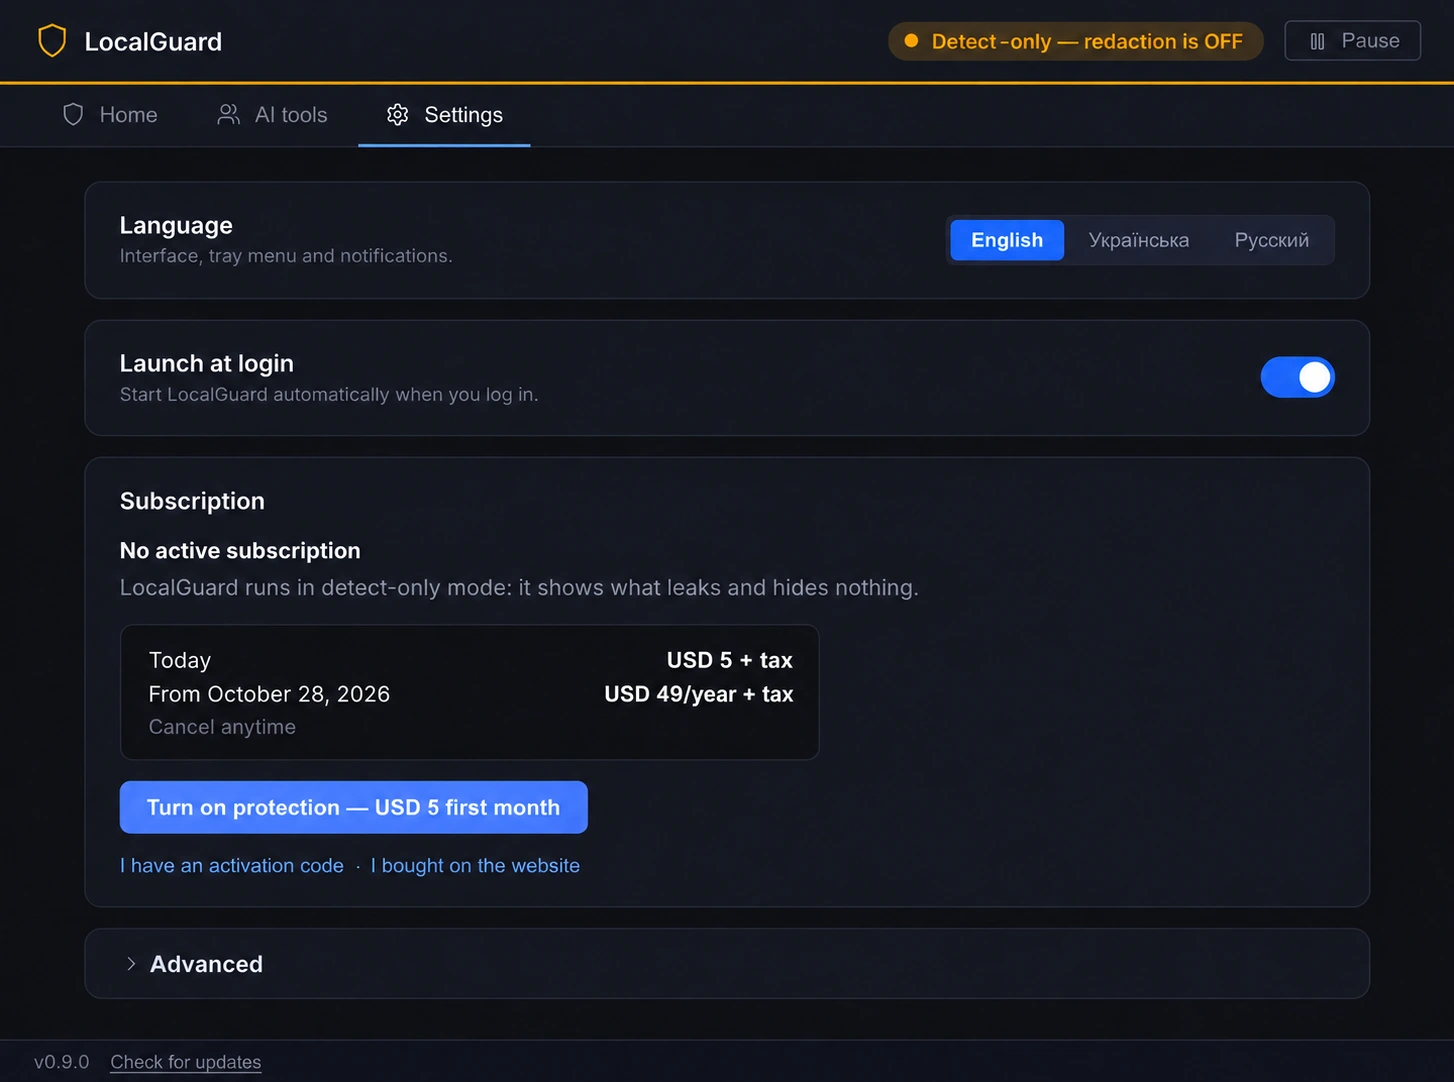
Turn on protection
Click Turn on protection, either on the Home tab or in Settings → Subscription. Checkout opens in your browser: USD 5 for the first month, then USD 49 a year + tax, cancel anytime. As soon as the payment goes through, the app activates itself, so there is no key to copy.
From then on LocalGuard replaces secrets with placeholders before a request leaves your machine and puts the originals back into the answer, so your tools work exactly as before.
Bought on the website? Open Settings → Subscription, choose I bought on the website, enter your email and the 6-digit code we send you. One subscription covers one computer: activate it on a new one and it moves there, the old one returns to detect-only.
Check what was hidden
With protection on, the Home tab shows today's totals in plain words (5 API keys, 3 emails) and a timeline: which tool, which provider, what was hidden and when.
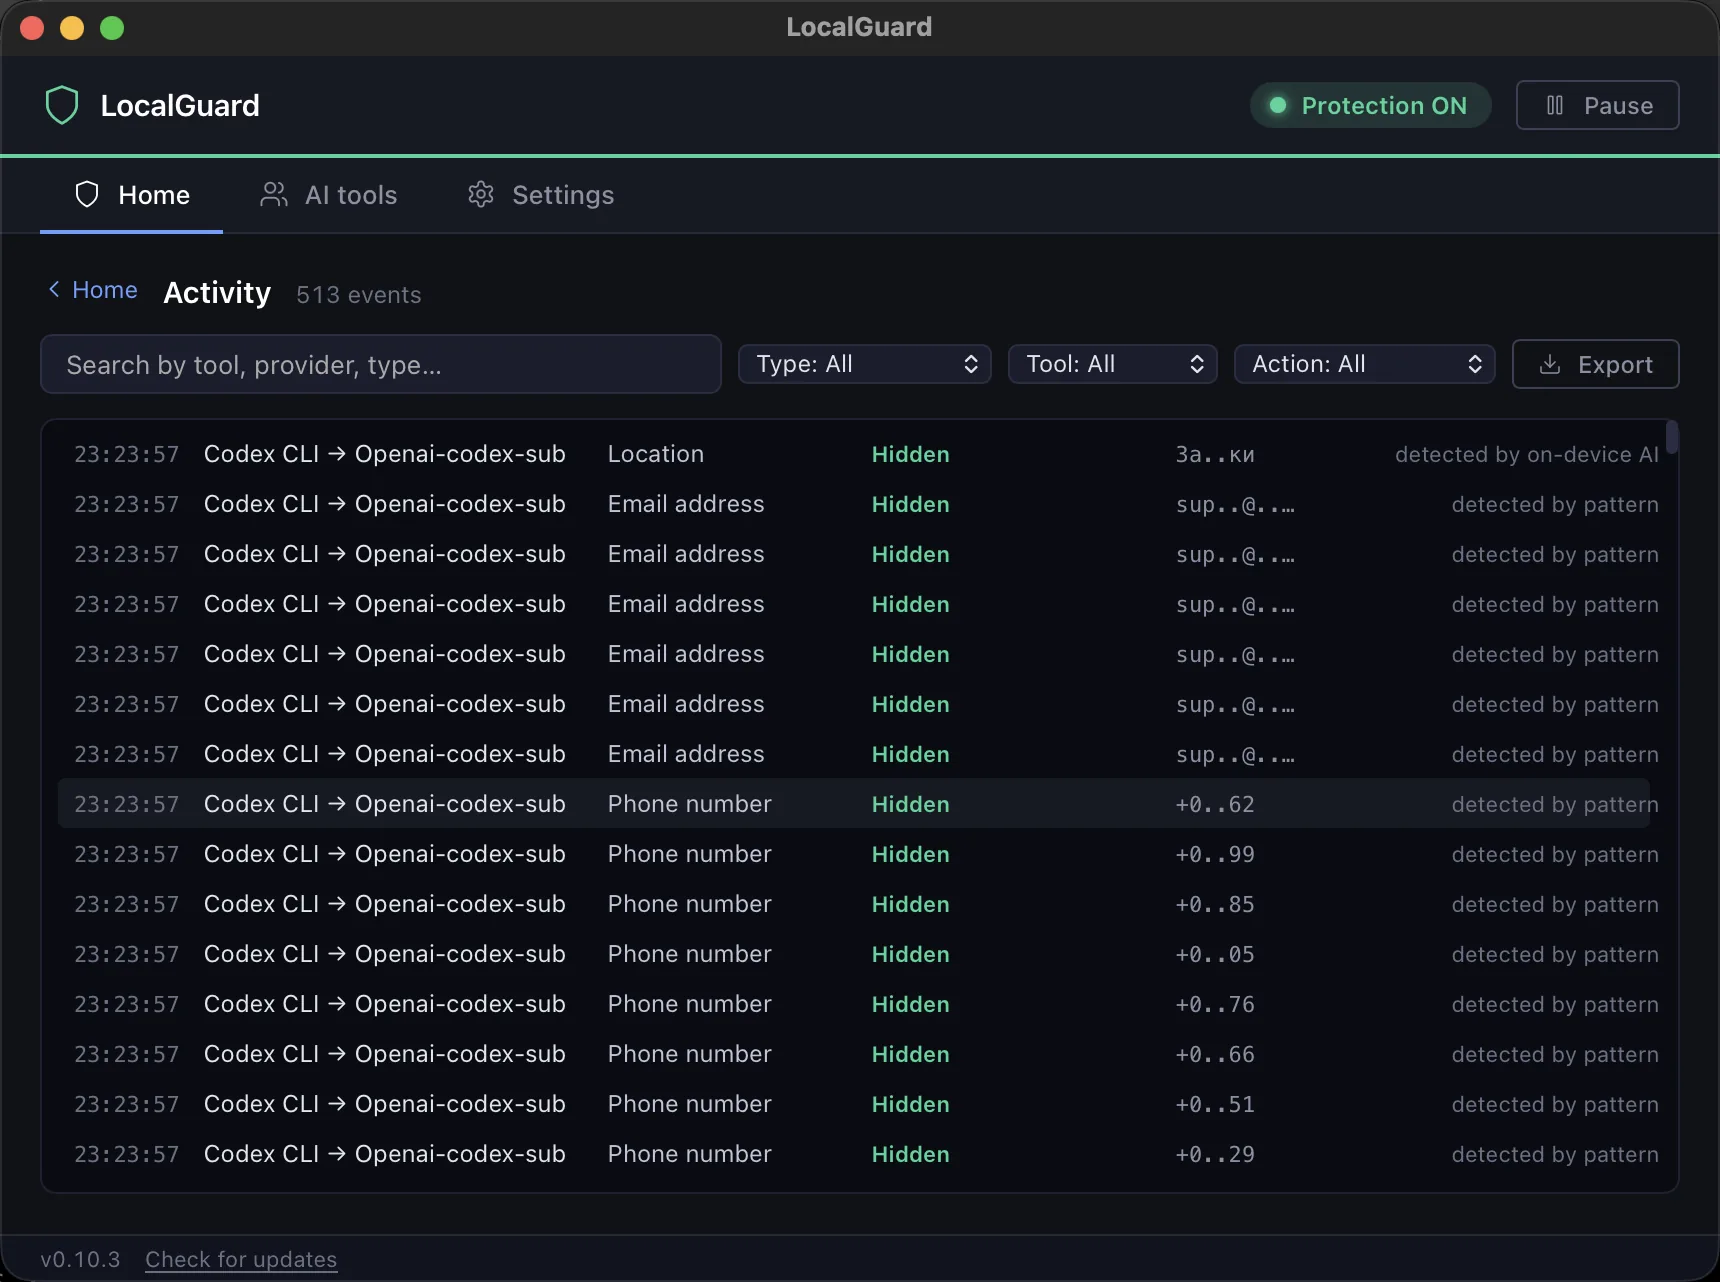
Show all opens the full activity log: search, filter by type, tool or action, and export to a file.
Optional: add a custom connector
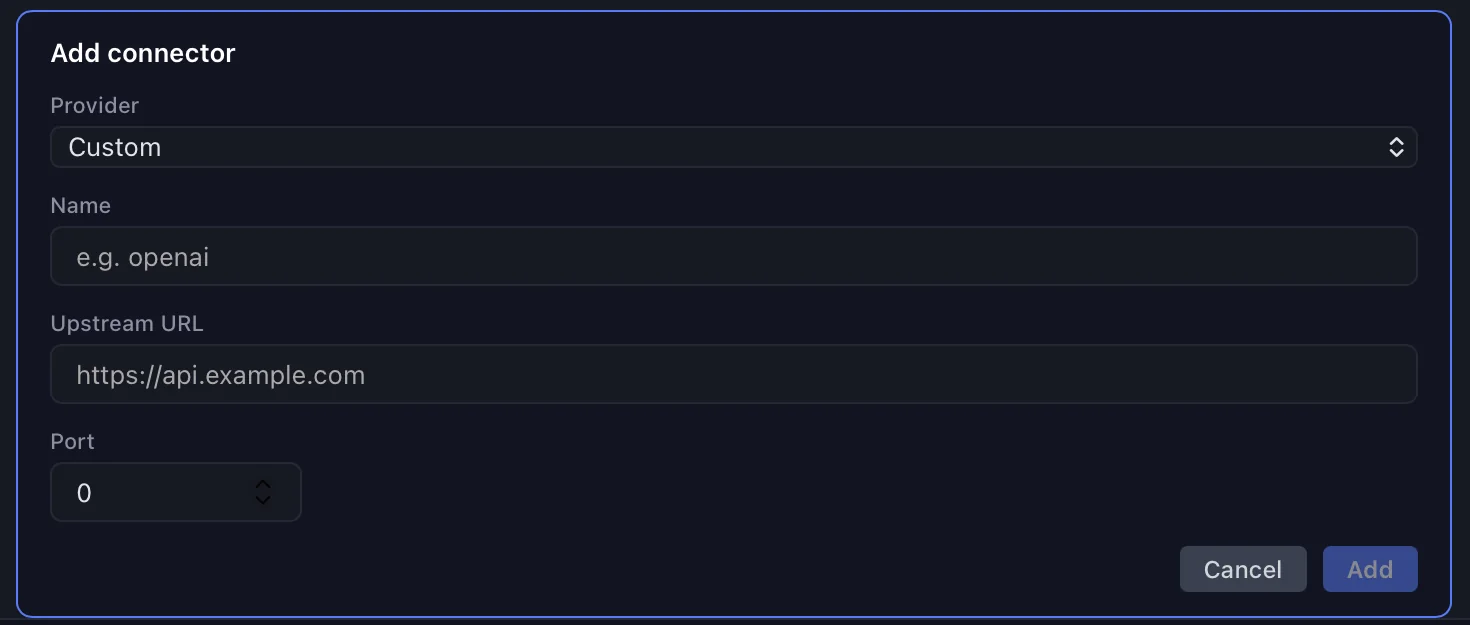
Using a provider LocalGuard doesn't ship a connector for? Open Settings → Advanced → Connectors and click + Add. Fill in a name, the upstream URL of the real API and a local port. LocalGuard listens on http://127.0.0.1:<port>; point your tool at that address and every request is scanned before it goes upstream.
Anything HTTP works: an internal LLM gateway, an on-prem inference server, OpenRouter, Together, Hugging Face Inference, anything that speaks HTTP and takes a Bearer token.
Or connect a tool manually
Prefer editing config files yourself, or using a tool that's not on the AI tools tab? Two steps:
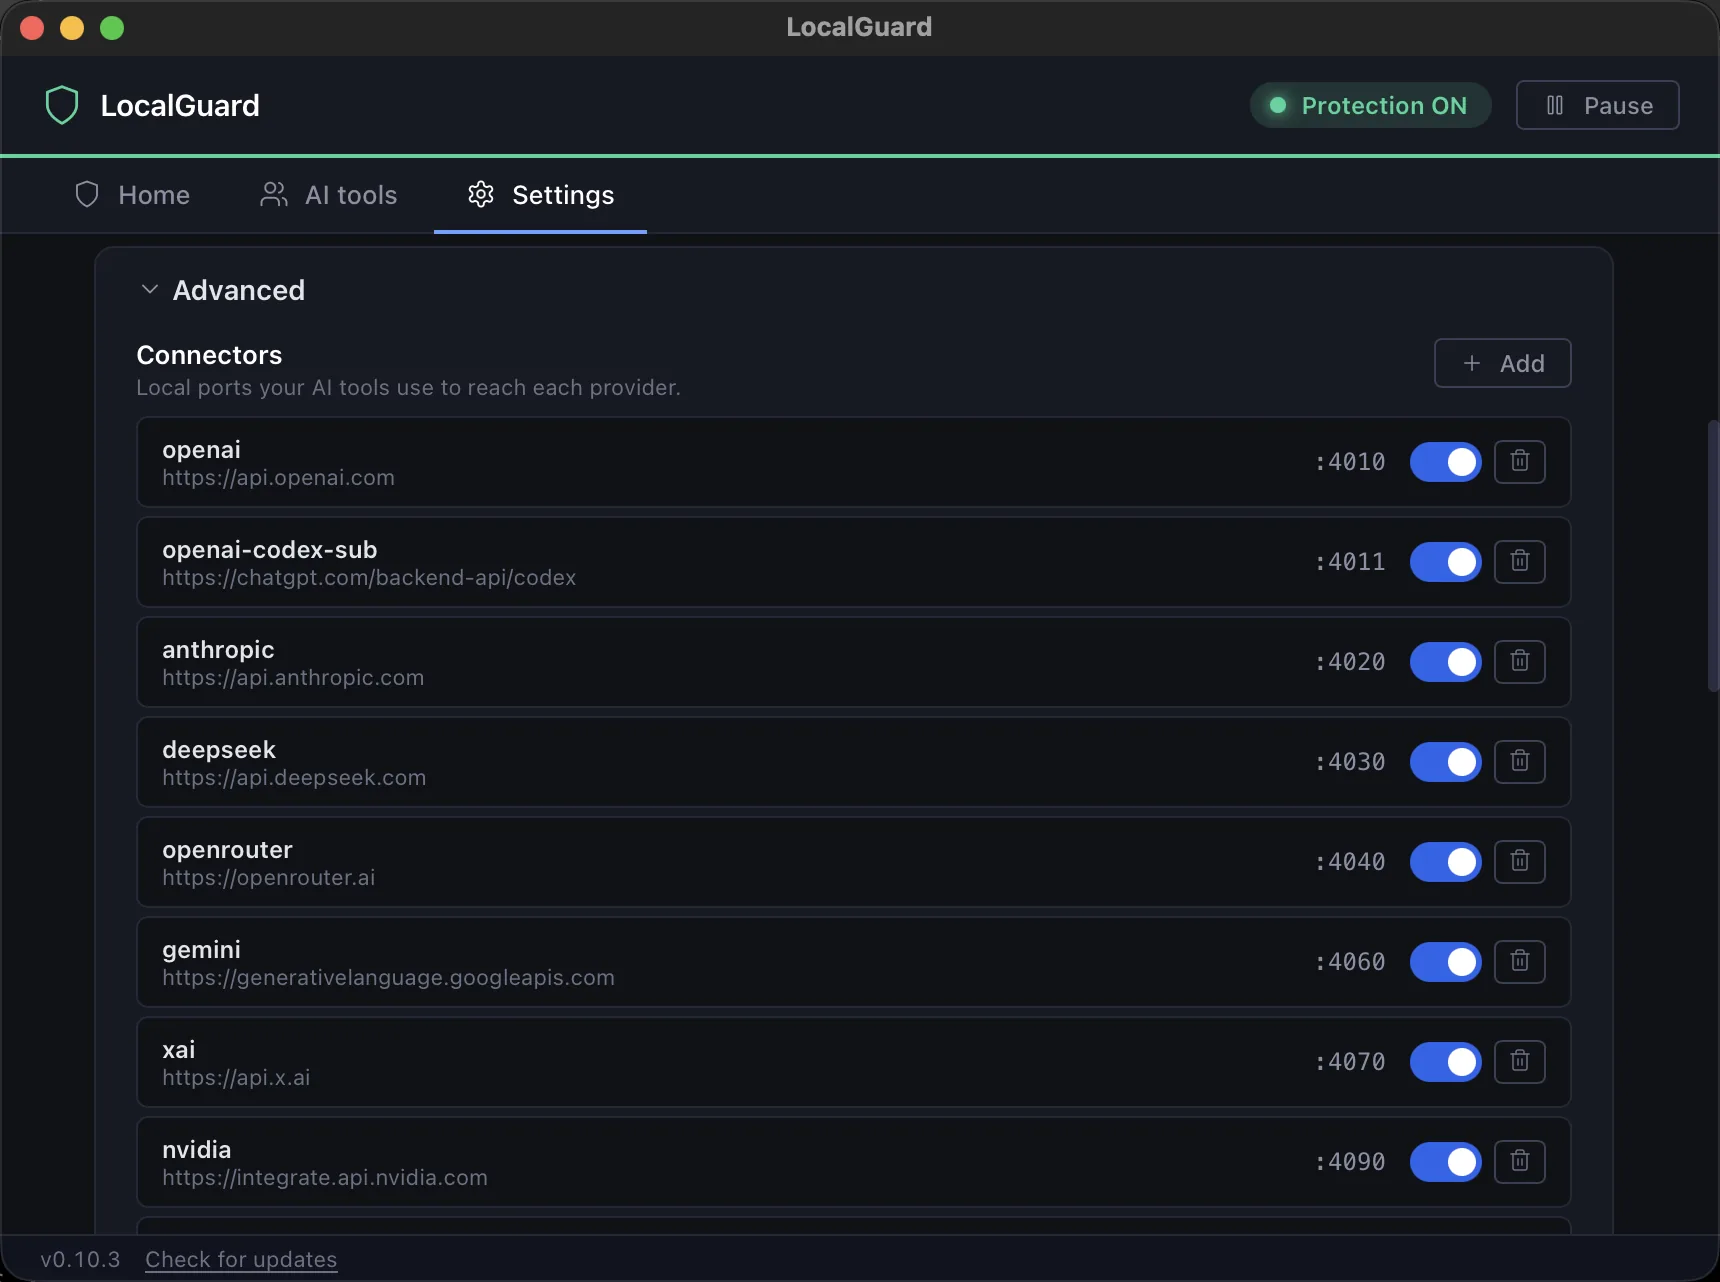
1. Find the local port. Open Settings → Advanced → Connectors. Each connector shows its local port (:4010, :4020, :4060, …). That's the address you point your tool at.
2. Change the tool's API base URL to LocalGuard's local address. Three common examples:
-
Claude Code
~/.claude/settings.json{ "env": { "ANTHROPIC_BASE_URL": "http://127.0.0.1:4020" } } -
Codex CLI (OpenAI API key)
~/.codex/config.tomlmodel_provider = "localguard" [model_providers.localguard] name = "LocalGuard" base_url = "http://127.0.0.1:4010/v1" wire_api = "responses" env_key = "OPENAI_API_KEY" supports_websockets = false -
Aider
~/.aider.conf.ymlopenai-api-base: http://127.0.0.1:4010/v1
Restart the tool. From now on it talks to LocalGuard, and LocalGuard forwards each request to the real provider.
Default ports: OpenAI-compatible providers :4010, Anthropic :4020, Gemini :4060. Codex with a ChatGPT plan instead of an API key uses its own connector, so connect it from the AI tools tab.
On Windows: ~/ means %USERPROFILE%\ (e.g. C:\Users\yourname\.claude\settings.json).
You're set
Requests using the connected local routes now pass through LocalGuard before they leave your machine. With protection on, secrets are replaced before they reach the provider and restored in the answer. Check each tool's coverage in the AI tools tab; cloud features and project overrides can use separate routes.